Setup for Hybrid Workshops
Abstract
Hybrid: From Latin hybrida, a variant of hibrida. Something of mixed origin or composition; often, a tool or technology that combines the benefits of formerly separate tools or technologies.
(Source: Wiktionary)
Hybrid workshops allow people online and on-site to collaborate, both in education/training, or other types of meetings.
Before COVID-19, workshops and trainings were commonly held in a meeting room or event space (“on-site”). That changed to pure online meetings (with Zoom, WebEx, MS Teams, or similar video conferencing software).
More recently a third kind of workshop became more important – the hybrid variant: Some people gather on-site, others participate online.
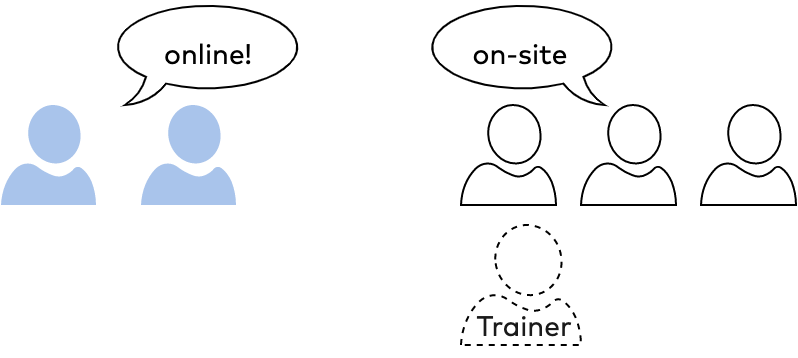
Figure 1: Online vs. On-site
In this post you learn how to set up such hybrid workshops, you learn about challenges and pragmatic solutions to conduct such events yourself.
Hybrid? Isn’t online the new normal?
Some people really got tired of online meetings and events during the pandemic, and really longed to meet people in real life again – zoom fatigue became a real thing. Let’s call this group the onsiters. Others have gotten used to working remotely from their home office, they don’t like to travel, they want to save travel expenses or have other reasons to prefer online participation. Let’s call the latter the onliners.
In my professional life I both do consulting work and conduct trainings – both activities are heavily based on interacting with people.
Online sessions with Zoom, WebEx, MS Teams, or BlueJeans were the new normal for several months during the beginning of the pandemic. It works reasonably well for all kinds of IT endeavours, but has considerable downsides. I’m sure all onsiters know what I’m refering to – a video call is simply not the same as a face-2-face chat in the coffee kitchen or over a real lunch.
In the last few months, I encountered a strong demand for combining online and onsite workshops. In an increasing number of my trainings, some people wanted to join onsite, others weren’t yet allowed to travel or simply preferred to participate online due to other reasons. Keeping both groups separated didn’t seem reasonable to me, therefore I searched for solutions capable of combining both worlds, without compromising workshop efficiency (and fun!).
For my research I visited hybrid conferences, interviewed technology experts and event organizers, and of course watched several hours of YouTube tutorials. The outcome: A pragmatic setup that is affordable and got battle-tested.
Our Hybrid Scenario
Before we dive in, let’s look at the generic scenario, with some people on-site, others online. Our workshop groups have a size of 5–24 people. See the section on larger groups.
Every workshop has a moderator, facilitator, or trainer – sometimes two of these. I’ll call them trainer for short. At least one trainer works with several people in a room, others participate online. Slides, documents, or other content are displayed on a large screen via a projector.
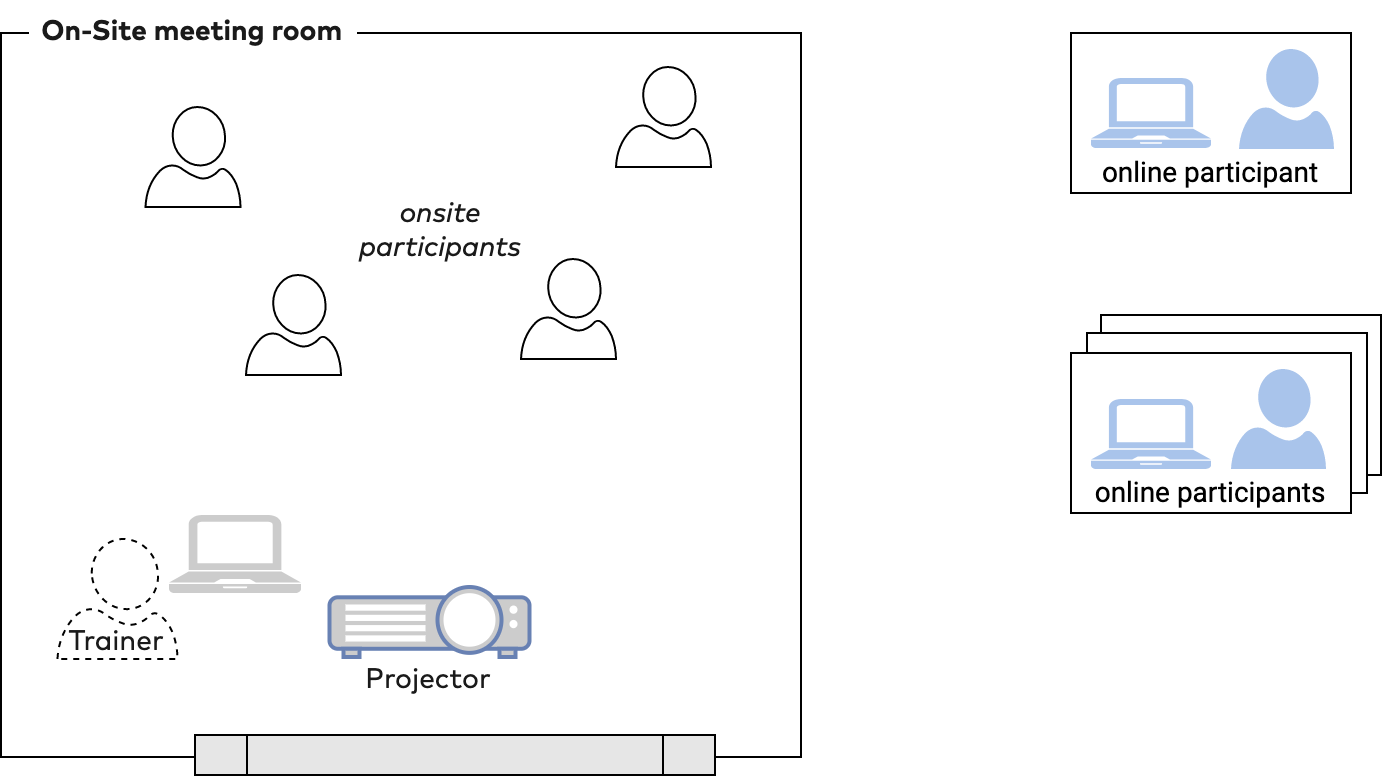
Figure 2: Generic hybrid scenario
Requirements for Hybrid Trainings
Must-Haves
- (R1) Visible trainer: Trainers shall be visible at all times for everybody else
- (R2) Excellent trainer audio: Audio quality of trainers shall be crystal-clear without distortion
- (R3) Visible room: Every online participant should be able to see the onsite event space at all times
- (R4) Visible online participants: Every onsite participant should be able to see and hear all online participants at all times (provided their webcams are enabled)
- (R5) Everybody can always be heard: Every onsite participant can hear every onliner, if the latter speaks – and vice versa
- (R6) No acoustic feedback: There must never be any disturbing acoustic feedback
- (R7) Working groups: It shall be possible to collaborate in several smaller working groups during breakout sessions
- (R8) Thrifty: No additional personnel shall be needed to operate video or audio equipment (provided all trainers are capable of handling such)
Nice-to-Haves
- Excellent trainer video: Video quality of trainers, moderators, or facilitators shall be excellent (at least HD resolution with natural colors). Use a DSLR camera with decent lense, if possible
- Joint working environment: Onsiters and offsiters shall be able to collaborate on artifacts or documents
Prerequisites
The event space needs to be equipped with appropriate internet connectivity, either wireless or wired connections. Roughly approximated, a video call needs at least 2MByte/second for each participant in the room, both up- and downstream. Such capacity can be handled by conventional wireless routers, although I suggest to use cable-based internet access at least for trainers or presenters.
Another obvious prerequisite is some online video platform. We have become quite fond of Zoom, but the general setup is similar with others. Please beware – some features of my setup will work only if your video platform supports virtual cameras (see below).
The Minimalistic Approach
Setup of two cameras, two microphones, and two notebooks, as shown in the following diagram:
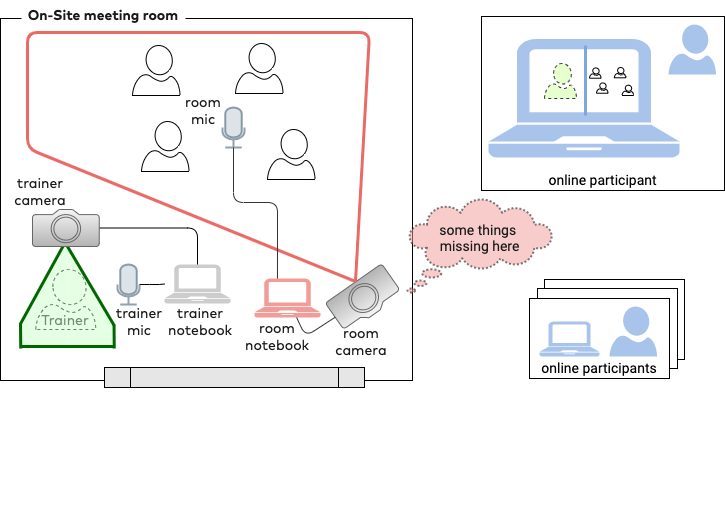
Figure 3: Minimalistic setup
Minimalistic (and FAULTY) setup
- The trainer camera captures the trainer at all times, supported by a dedicated trainer microphone. Both are used as input for the trainer’s video session and transmitted to the online participants.
- A second camera captures the on-site participants, likely in a panoramic view of the room. A second microphone enables the onsiters to speak to the onliners. For this to work, you will need a dedicated notebook plus a second video session.
With this setup, we have requirements R1-R3 covered, but R4 and R5 are still missing. To cover R4 (visible online participants), we need a large-enough monitor to display a gallery view of all onliners at all times. You can connect that display to the room notebook.
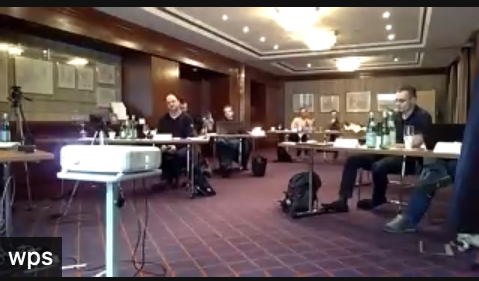
Image 1: Sample room view
In my first hybrid training, I set up all those devices, and optimistically thought I could easily achieve R5 (everybody can be heard) by attaching a speaker to the room notebook. But screeech – an awful acoustic feedback reminded me that this setup needs to be improved! Let’s step back and discuss acoustic feedback before we continue:
Acoustic Feedback
In case you think that a section on a physical phenomenon is a waste of time – please read on: It’s really important that you get a basic understanding – as acoustic feedback proved to be a (if not the) major challenge in setting up hybrid trainings.
Let’s ask Wikipedia about acoustic feedback, as they are known for concise and often clever answers:
Before you read the explanation, you can listen to an example (it’s really awful, imho).
Audio feedback (also known as acoustic feedback, simply as feedback, or the Larsen effect) is a special kind of positive loop gain which occurs when a sound loop exists between an audio input (for example, a microphone or guitar pickup) and an audio output (for example, a power amplified loudspeaker). In this example, a signal received by the microphone is amplified and passed out of the loudspeaker. The sound from the loudspeaker can then be received by the microphone again, amplified further, and then passed out through the loudspeaker again.
It’s fairly easy to get this kind of (unwanted) acoustic feedback, if you open more than one online video session in the same room. Try it out – open a video session (e.g., with Zoom) on your computer, and dial into this same session with your smartphone. Now turn on audio on both devices. Awful, isn’t it?
The modern video platforms avoid acoustic feedback to a large extend – but if you operate several sessions in the same room, you need to take some extra measures.
Room Audio Setup
As a solution, connect all microphones and the speaker to the trainer notebook. Notebooks have only a single microphone input jack – but appropriate adapters can help.
The following diagram illustrated the proposed room audio setup, and the image below shows my concrete solution, based upon Røde microphones and adapter. That kind of audio setup can be managed by a single person, as nothing needs to be adjusted during the training.
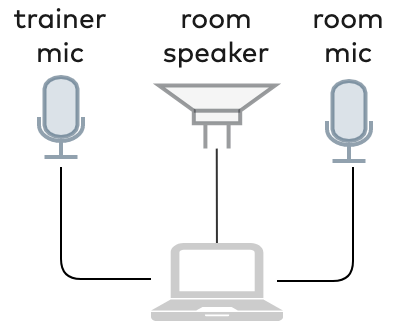
Figure 4: Centralized audio
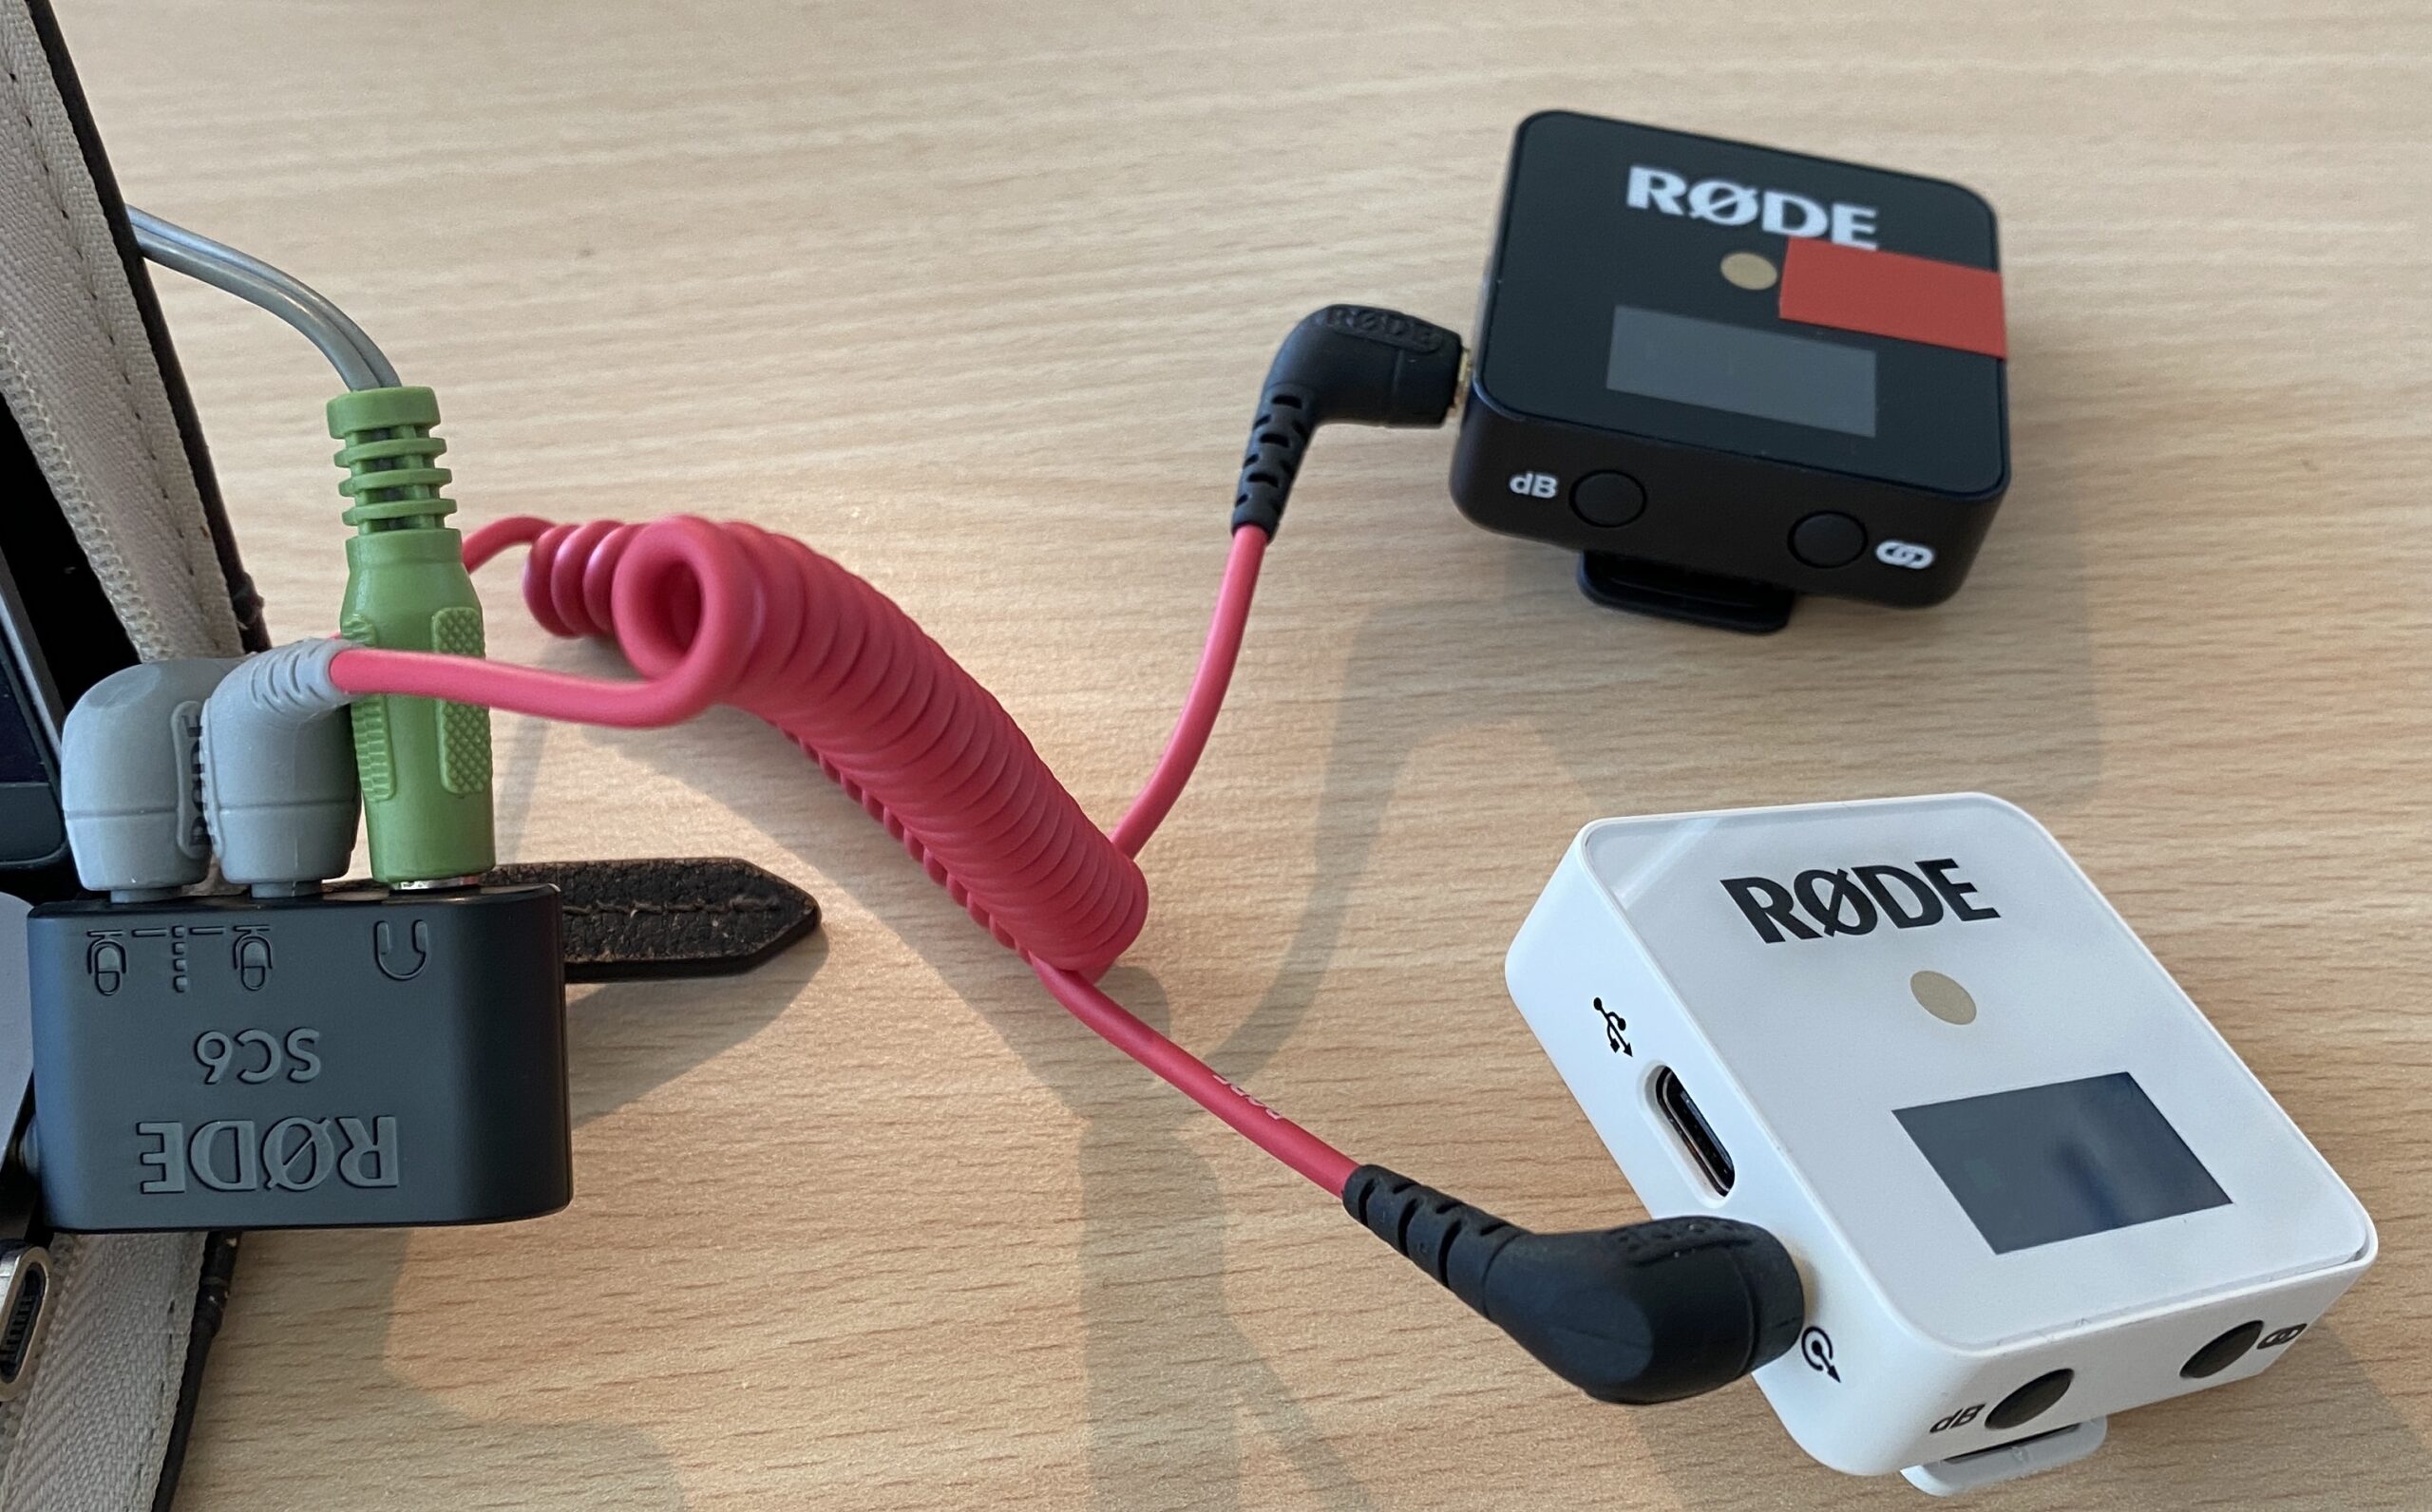
Image 2: Røde setup example
By now, we covered all requirements R1-R8, the setup is quite easy to operate by a single person.
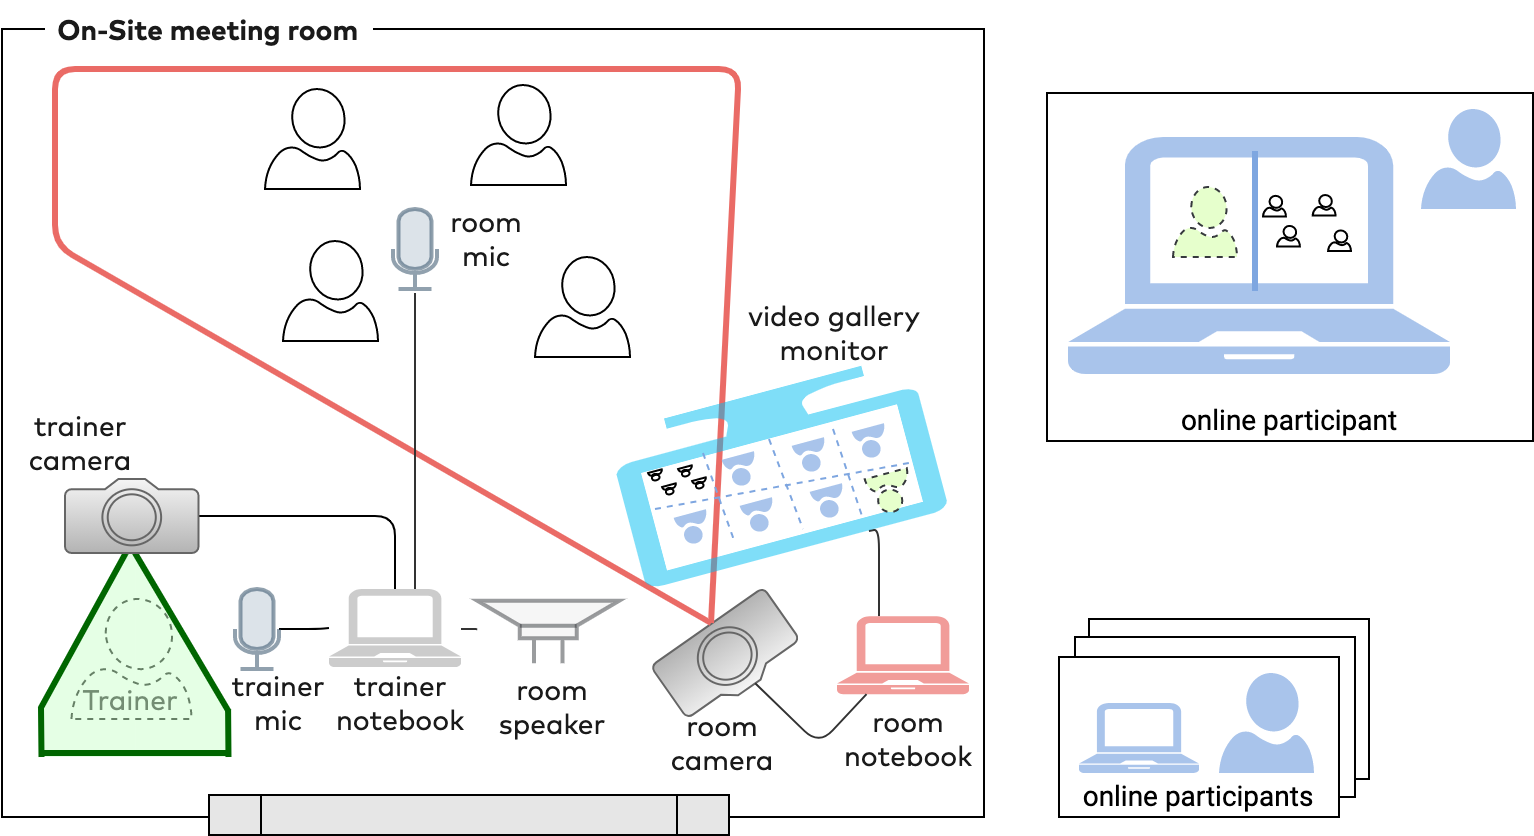
Figure 5: Complete setup of cams and mics
Two trainers
Two trainers who take frequent turns make trainings more effective and fun. The downside: They require even more equipment in hybrid trainings.
For my trainer colleague, I connected a third (wireless) microphone to a USB-Audio adapter, as shown in the image below. These little guys imitate a soundcard – your computer recognizes them as USB sound devices.
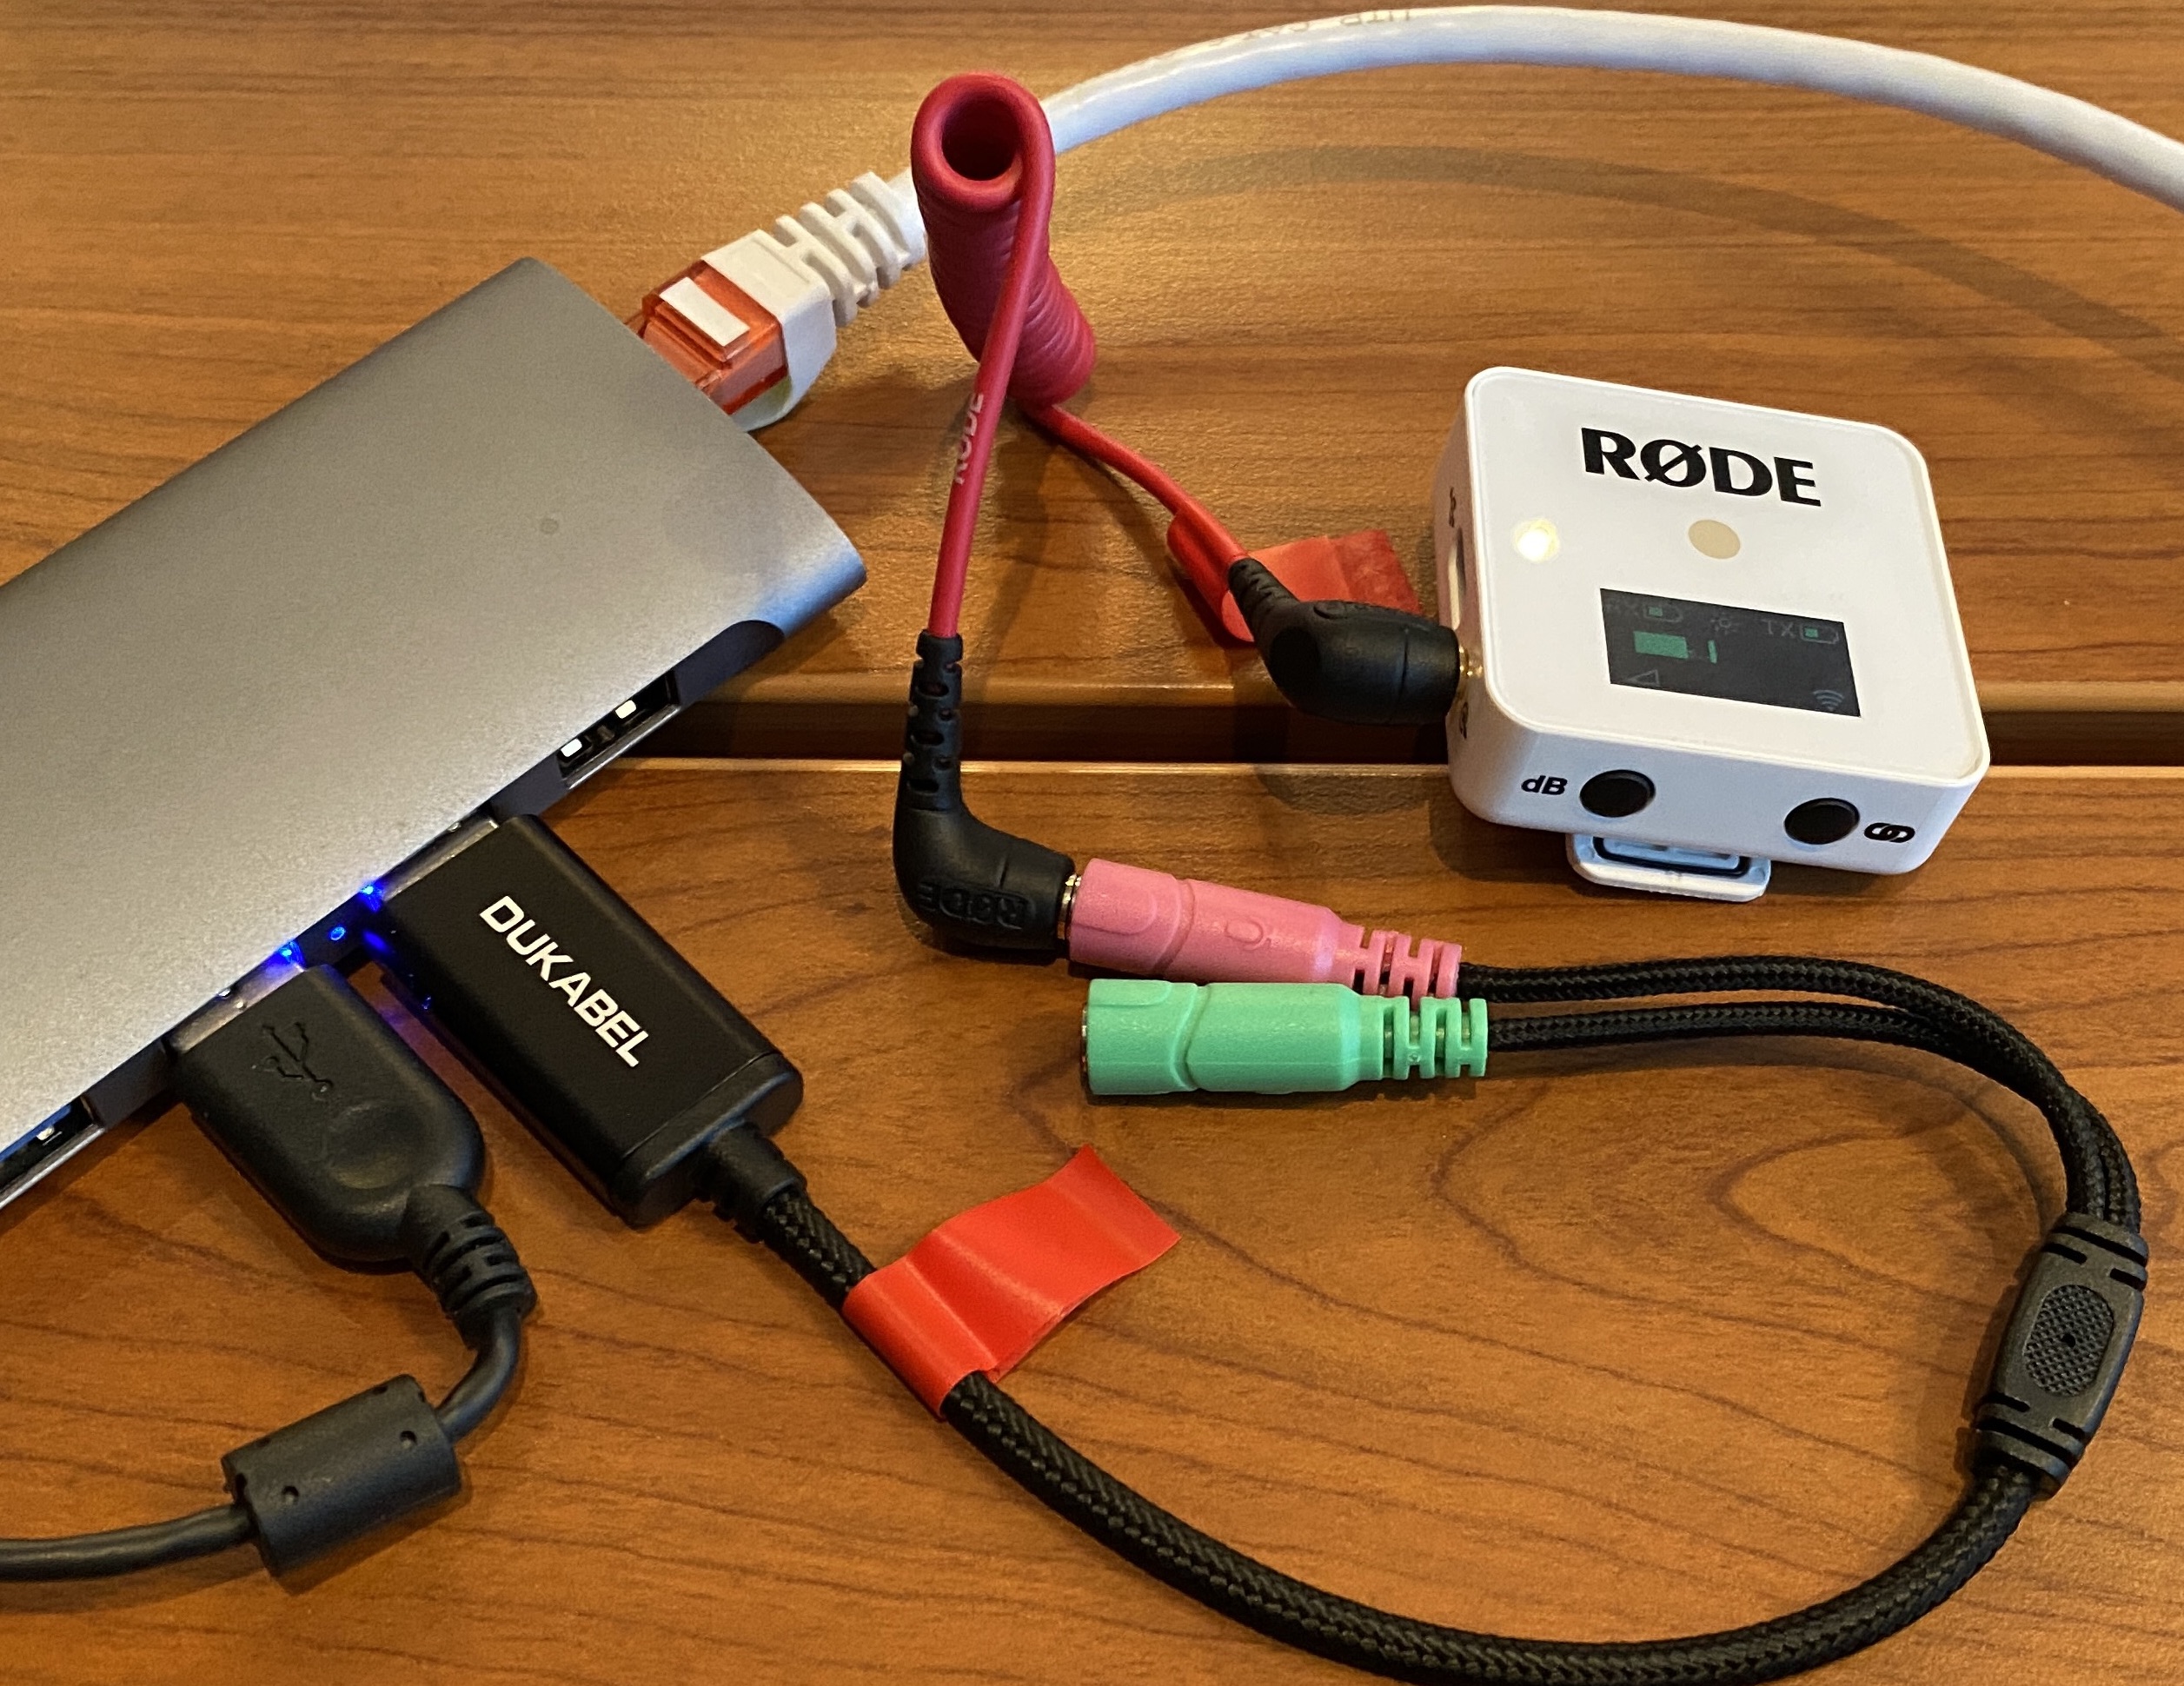
Image 3: Third micro via USB
But now another challenge arises: Zoom can handle only a single audio input, but now our trainer notebook has two distinct audio sources. Luckily, there are several fancy solutions to combining audio sources. I prefer Loopback, as I’m working on MacOS. Soundflower is a well-known alternative. For other operating systems you need to search for virtual audio software.
Loopback can combine arbitrary sound sources to a single (virtual) audio device. In my Zoom session, I simply select that virtual device.
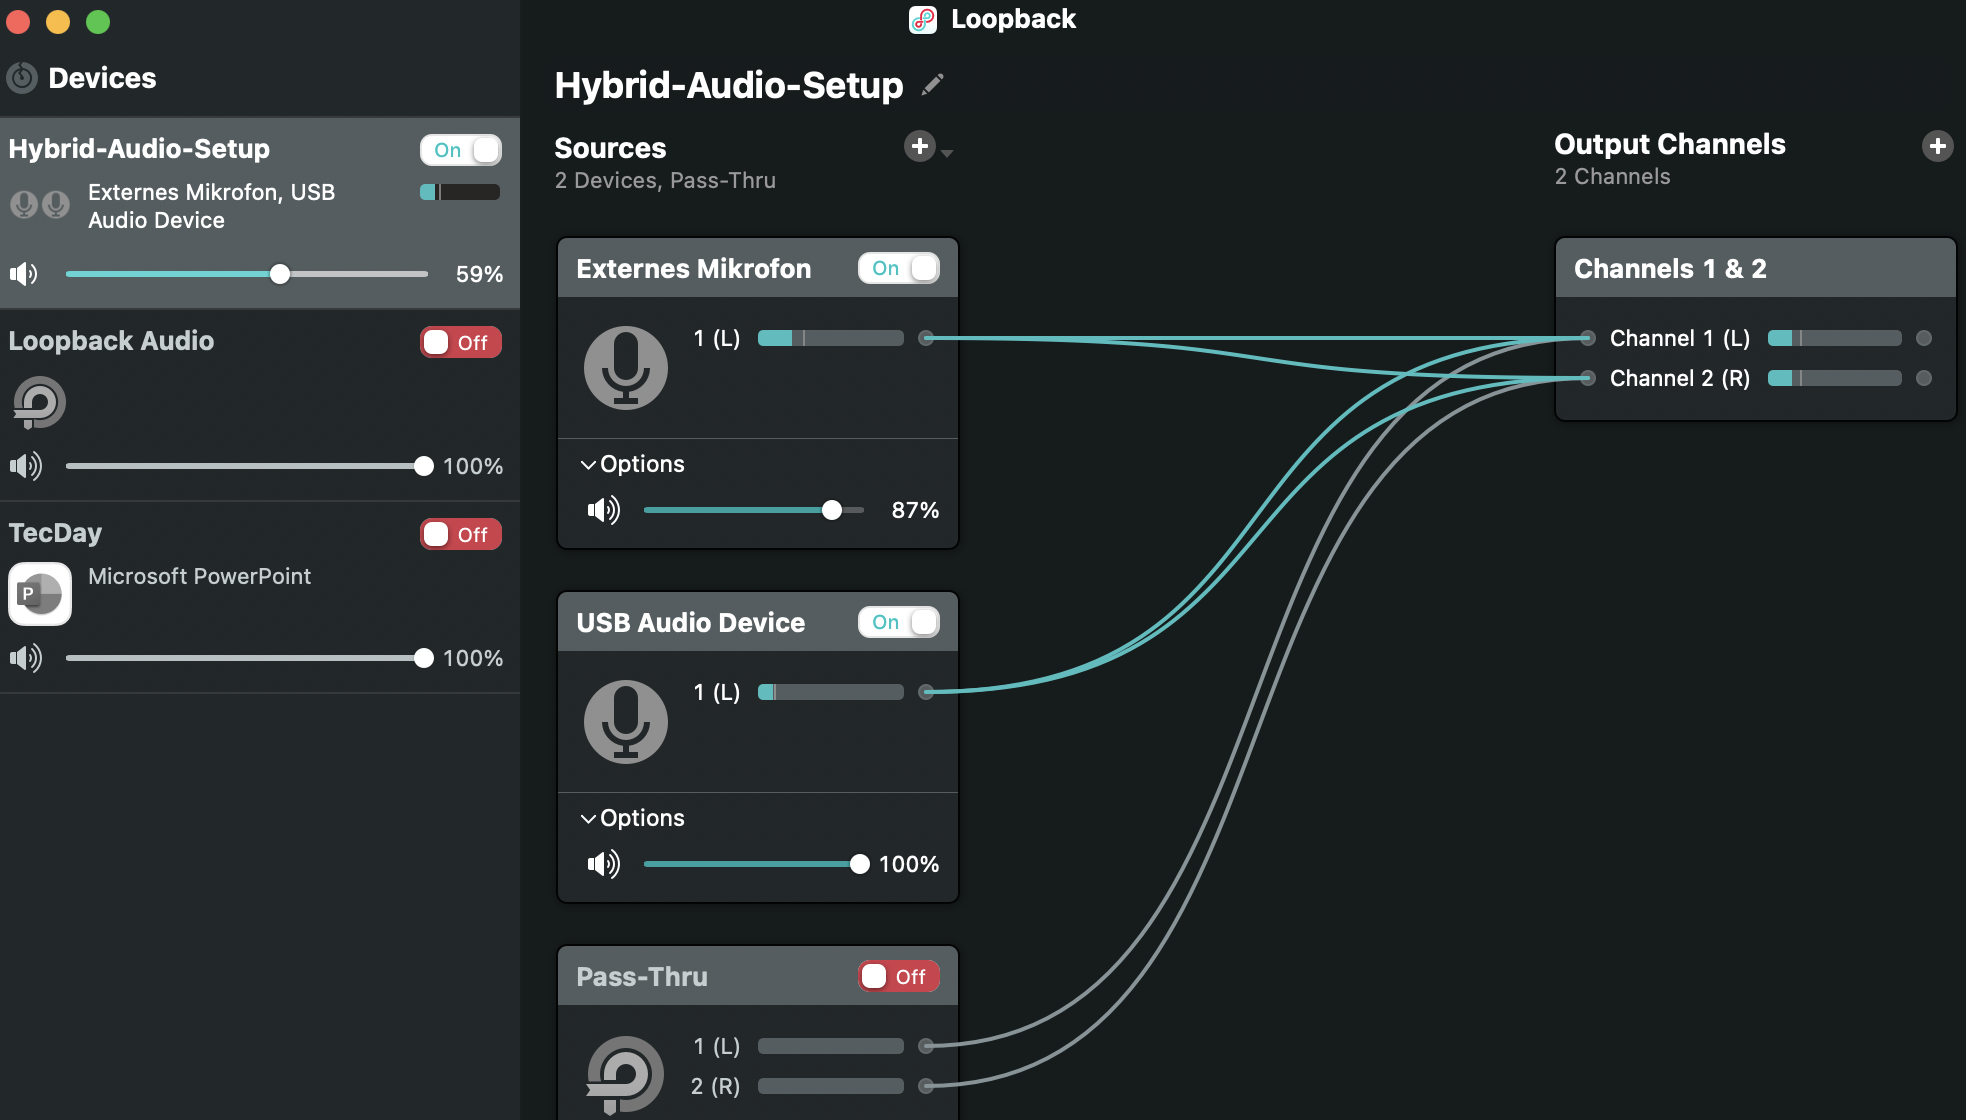
Image 4: Loopback screenshot
Improving Immersion for Onliners
As a trainer, I love to walk around rooms instead of sitting in front of my camera. Movement creates attention and action within a room, and I propose you to stand or walk when teaching. But your teacher camera has a fixed position, optimized to capture your face and shoulders in a sitting position.
Therefore, I propose a third camera, aimed at the complete front of the room, the trainer-panorama cam. Most likely this will be a wide-angle lens cam. It either needs a third video session plus notebook, or you manually switch perspectives, e.g., with OBS.
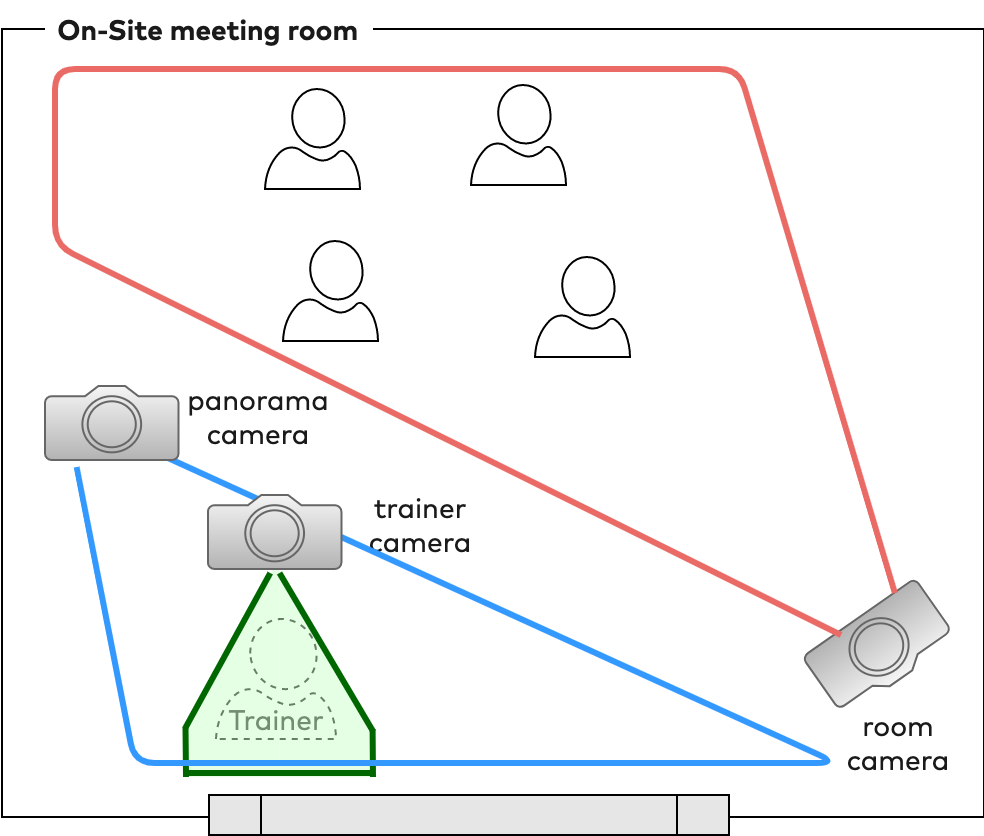
Figure 6: On-site meeting room with 3 cameras
The geeks among you readers might use an Elgato Streamdeck to change the camera from OBS with a push of a button. Although it is tempting, I personally use my Streamdeck only at home, but not in hybrid trainings, mainly to minimize the equipment-count. Changing OBS scenes requires only few clicks, that I can handle in trainings.
Below you find an example of the proposed panaroma view (photo courtesy of M. Meng). You can see the two trainers (fyi: Carola Lilienthal and Gernot Starke) plus the front part of the room, where both often walked around.
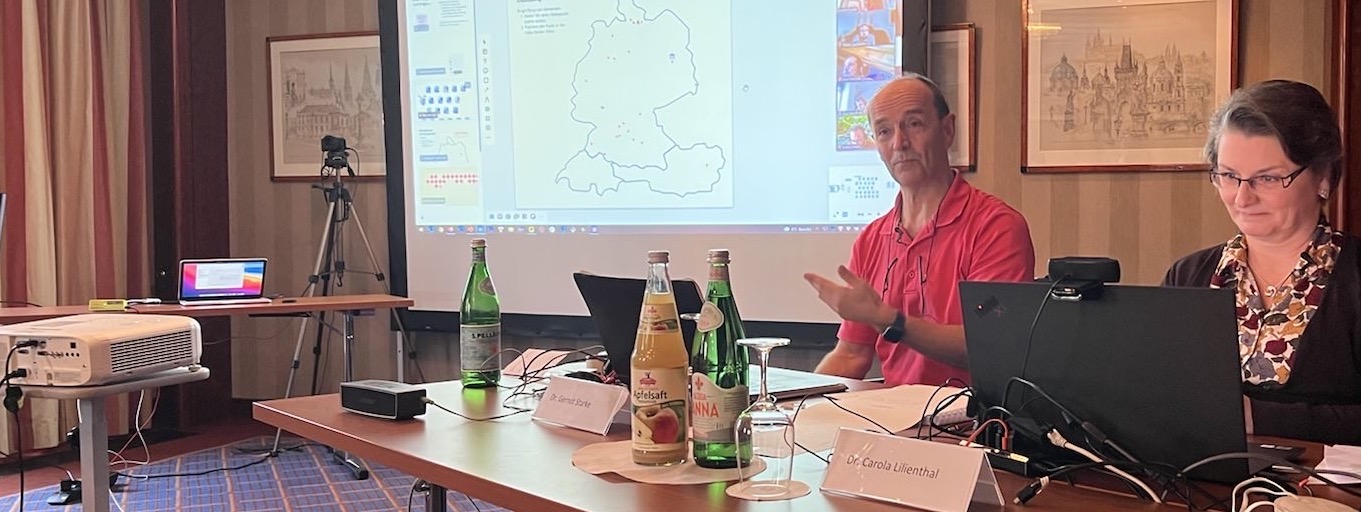
Image 5: Sample panorama view
Organizing Hybrid Working Groups
My groups were homogeneous, that is consisting either of onliners or onsiters. Mixed approaches would require additional equipment or zoom sessions, and there would be the immediate risk of acoustic feedback in the room if there are no additional real rooms available.
Therefore, keep things simple: Divide the on-site participants into 2–3 groups, and the online participants as well.
Use collaborative whiteboards for all groups, as the results of the different working can be shared among everybody. Yes, you’re right: It requires the onsiters to have access to a tablet or notebook, but one of these devices suffices for every working group.
Virtual Cameras
A virtual camera enhances your possibilities regarding the content you show to your audience, as you are no longer limited to your real camera’s output. With a tool like OBS you can blend in arbitrary media, images, timers, or even multiple cameras at the same time.
In addition, you can easily switch from one camera to another, providing a more varied visual experience for the onliners.
Some video tools don’t allow the use of such virtual cameras, though. Zoom and OBS collaborate like a charm – so I personally favor that combination.
Some Tips (aka lessons learned the hard way)
- Perform a technical check at least one full day prior to your training. You will surely have forgotten some detail, and might need to fetch the missing cable, adapter, or other gear before your participants arrive.
- Use cable-based internet access instead of wireless connectivity, especially for trainers.
- Provide a redundant communication channel accesible to everybody, even without internet access. I propose to use Signal messenger, as it’s available on smartphones for free, highly secure, and free to use.
- When assigning people into working groups, make a screenshot of the mapping of people to groups – as they will want to work in the same groups the next day.
- Store the chat protocol of your video session in your shared drive for future reference.
- Ensure that you or somebody else continously monitors the onliners and the online chat. That is one more reason to conduct hybrid trainings with two trainers.
- A second screen for your trainer notebooks provides the screen estate required for that monitoring. A tablet (like iPad) is sufficient.
- If you work with two trainers, use an HDMI switcher to share a single projector with two trainer notebooks. You don’t want to switch cables during a lecture or session! Alternatively, you could also project the video call, which means the same screenshare is visible to everyone – no matter if online or onsite, possibly even showing online participants in addition.
- Provide a common online collaboration tool for questions and answers, for example a joint Miro board (we called it our “Wall-of-Fame”).
- Bring a large-enough USB hub (or a sufficient number of chargers including a large power distributor) for every wireless microphone (sender and receiver). For our three Røde-Wireless-Go we needed six chargers, so we could recharge everything during breaks.
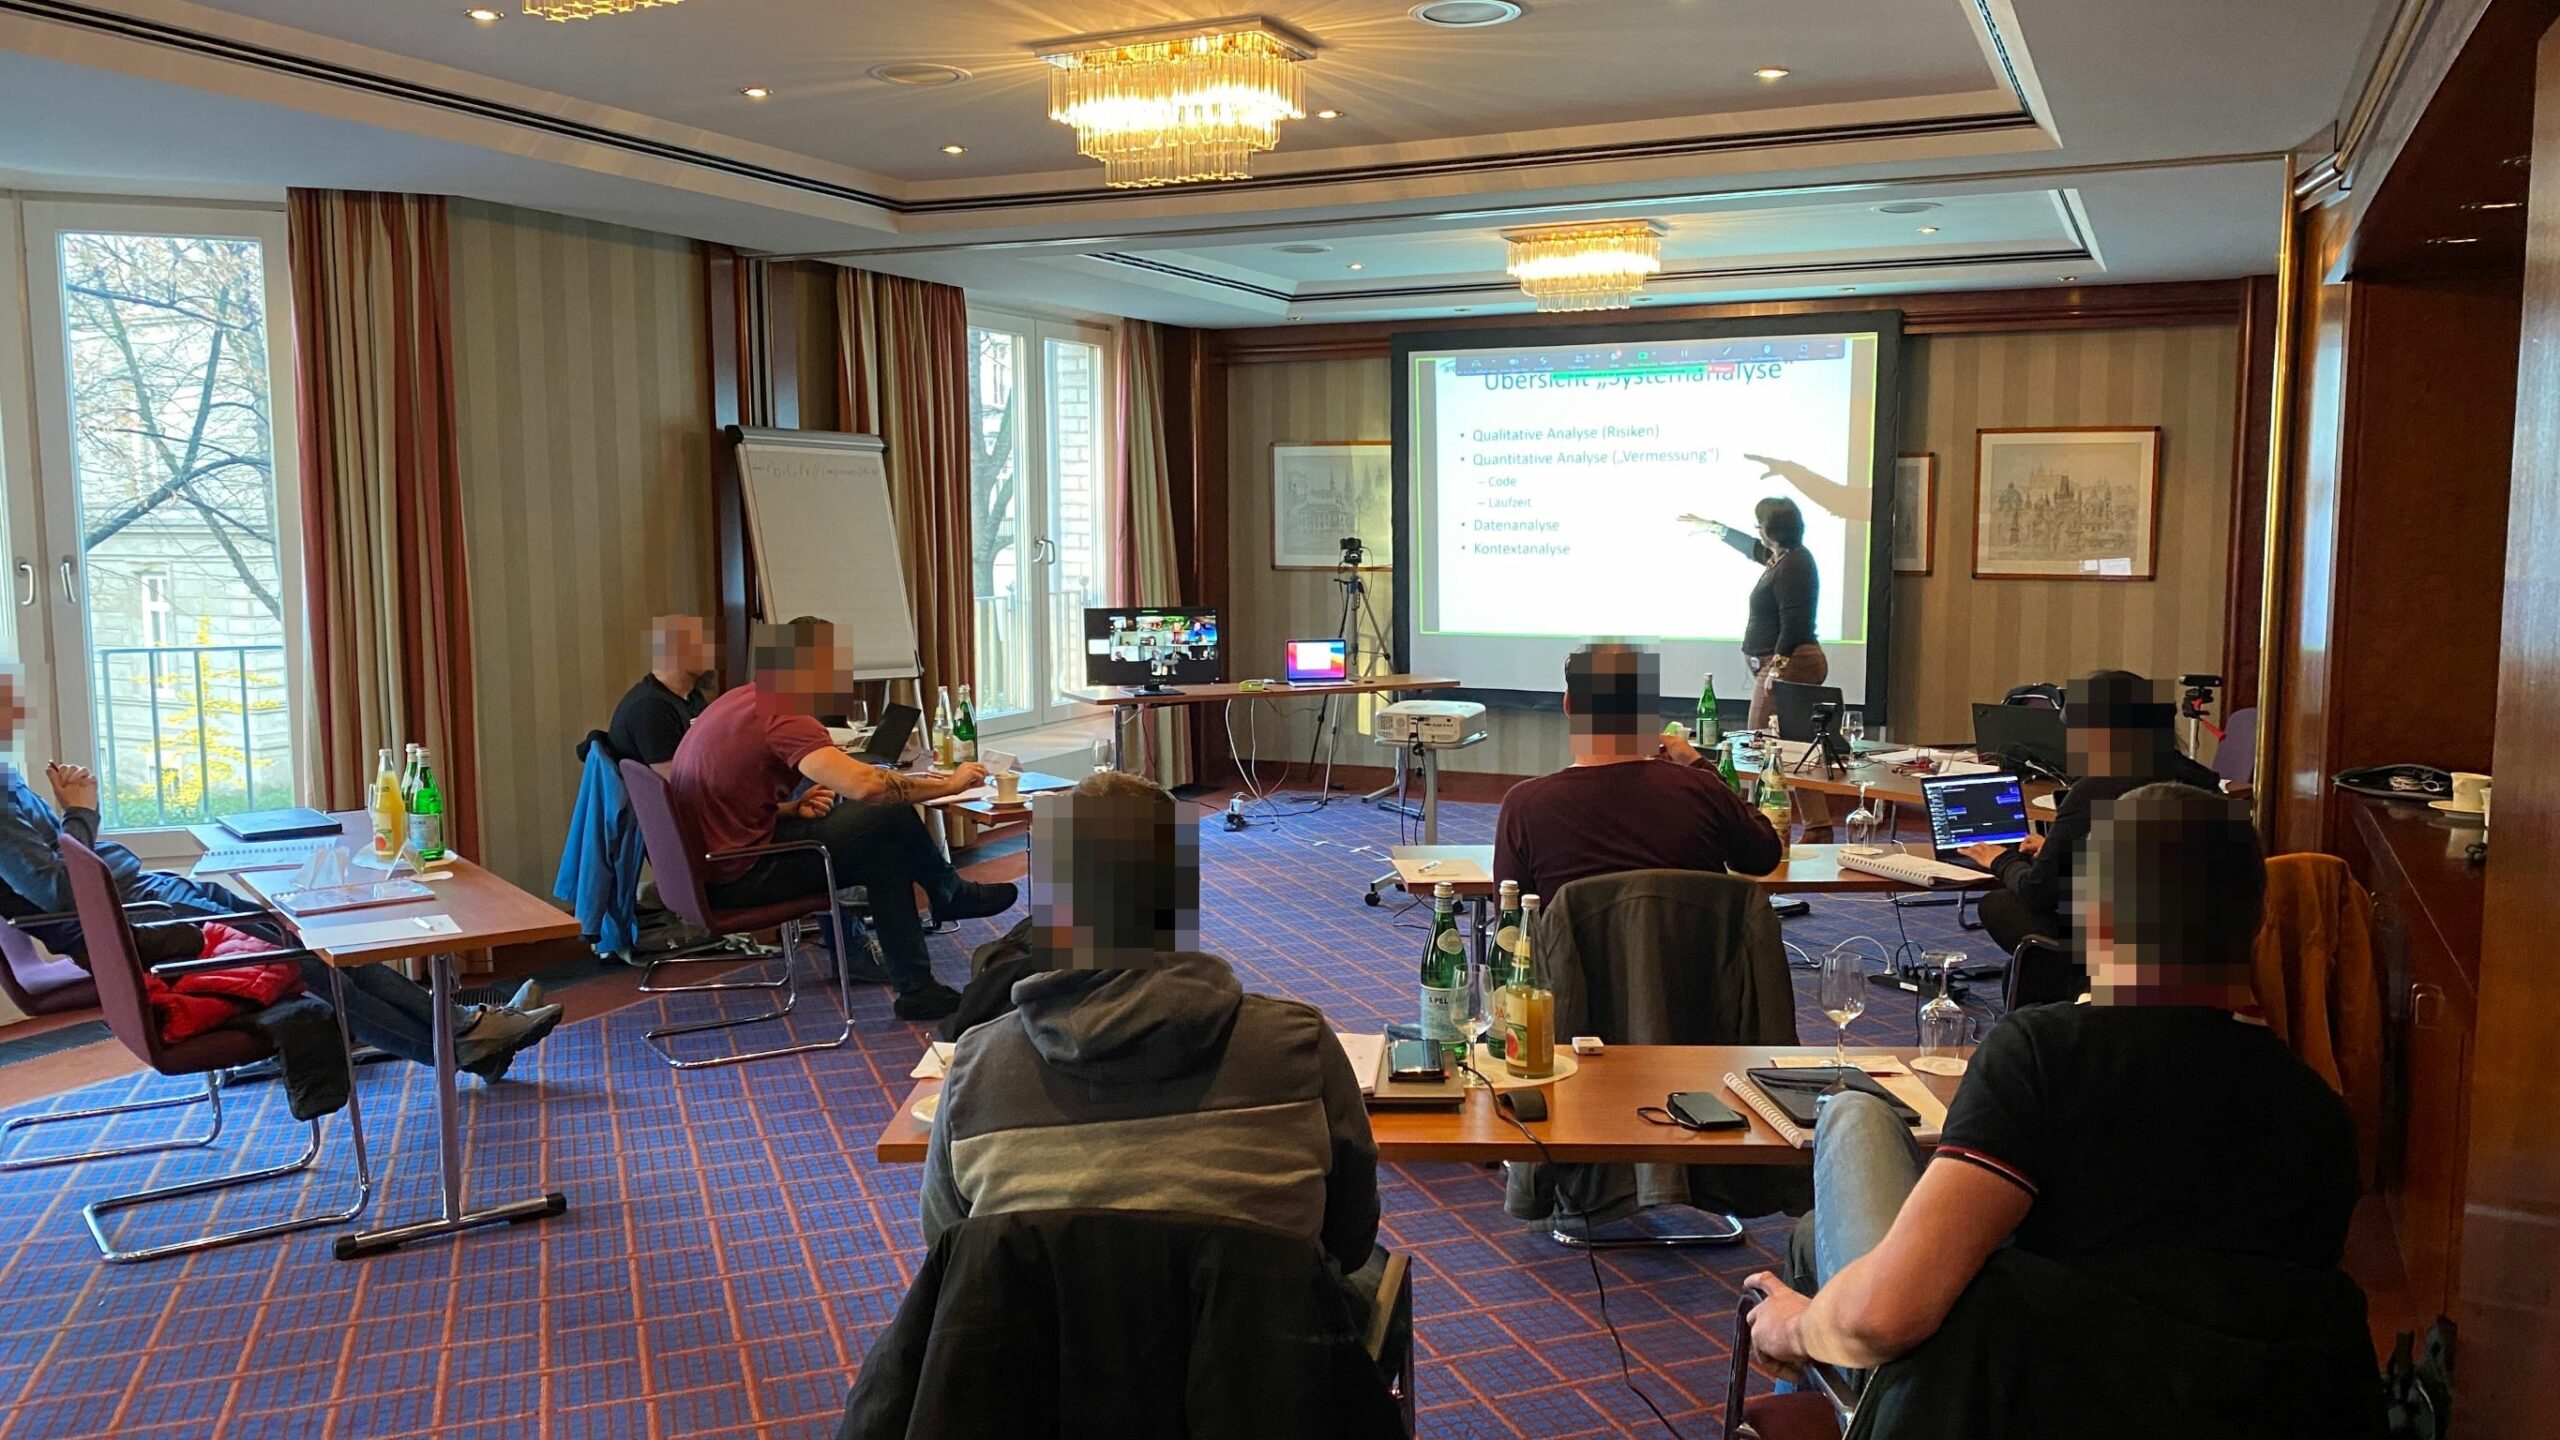
Image 6: Hybrid training example (Hamburg, November 2021)
Hardware / Equipment Summary
- Three cameras, at least two with high resolution clean video output (HD is sufficient). I suggest to use DSLR instead of WebCam, at least for the trainer and panorama cam.
- If you use DSLR cameras:
- Appropriate HDMI to USB converters (like Elgato Camlink or similar)
- Dummy batteries to power the cameras
- If your room is large, a wireless HDMI transmitter replaces dangerous cabling chaos
- Three tripods to mount the cameras
- Three notebook computers, one for each of the three required video sessions (see above)
- A loudspeaker capable of sufficiently filling the entire room with sound. I use a Bose Soundlink, a Marshal Emberton is a great alternative.
- A monitor sufficiently wide to display the onliners in a gallery view, so that the onsiters can see their companions. I suggest 31 inches or more. If your room is large, you should duplicate that display in the back half of the room with an HDMI splitter. The high-tech option: Use a second projector for the onliners’ gallery view.
- Learn OBS. It enables visual variety, lower thirds, timers, and all kinds of other gimmicks your participants will like.
- Even with professional equipment such as DSLR cameras and high-end microphones, make sure the room has adequate lighting and acoustics.
Handling Larger Groups (30–150 people)
I have no personal experience in handling larger groups myself, therefore I can only give broad advice here (my colleagues at INNOQ have, and they are currently writing up their experiences with organizing hybrid events with up to 150 participants…)
Larger groups might require loads of additional equipment and handling.
You will definitely need a more complex setup for acoustics, e.g., larger and more powerful speakers plus a reasonable number of wireless microphones for the onsite audience. More microphones will require an audio mixing device – and you will need somebody to setup and operate it. Some conferences had people walking around the room with the microphones – whenever someone from the audience wants to speak, they walk up to this person and pass the microphone.
Another issue in large rooms is camera coverage. You might want several cameras capturing the onsite audience, so the onliners can see the people onsite.
Credits
- Thanx to Dr. Carola Lilienthal, Petra Gramß, Michael Brosius, and Julian Gersch for their support in organizing a hybrid workshop in Hamburg, Germany.
- Thanx to Martina Meng for supportive review and improvement of the overall setup (and this post).
Share this article:
Related Posts


- « Previous
- 1
- 2
- 3
- 4
- Next »
About the Author